Cakesicles
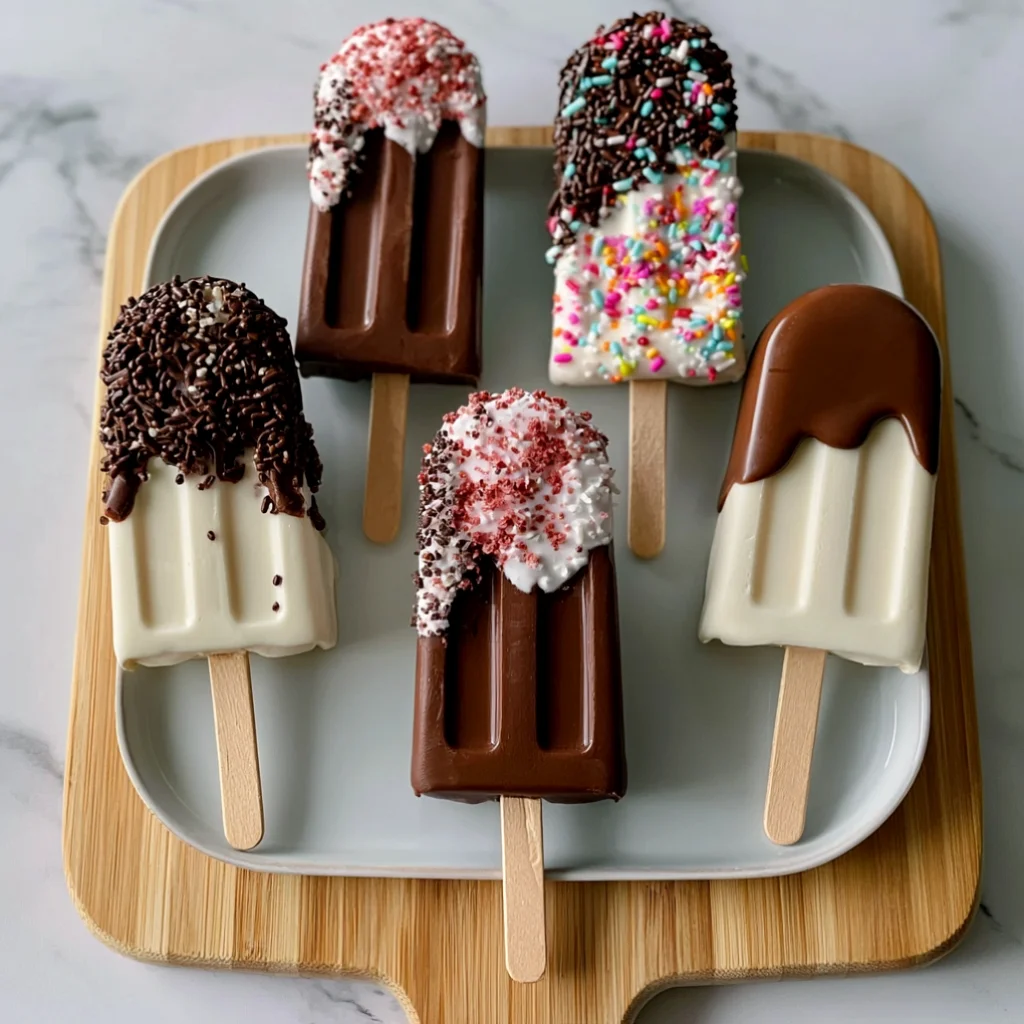
Cakesicles are the ultimate fun and creative dessert on a stick that combines the delightful flavors of cake pops with the refreshing appeal of popsicles. Perfect for parties, birthdays, or any festive occasion, these frozen cake treats are customizable and easy to make. With a variety of flavors, fillings, and toppings, homemade cakesicles can be tailored to suit any taste preference. The process is not only enjoyable but also a great way to engage with friends and family while creating something delicious. Here’s how to make these delightful treats at home, ensuring that each step is clear and easy to follow.
Ingredients
- For the Cakesicles:
- 1 box of cake mix (any flavor) – choose your favorite flavor such as chocolate, vanilla, or red velvet for different cakesicle experiences. Opt for high-quality brands for the best flavor and texture.
- 3 large eggs – fresh eggs work best for a rich flavor and moisture. Free-range or organic eggs can enhance the taste further.
- 1 cup water – filtered water is ideal for the best taste. Avoid using carbonated water, as it can affect the cake texture.
- 1/3 cup vegetable oil – can be substituted with canola oil or melted coconut oil for a different flavor profile. Olive oil is also an option, lending a unique taste.
- For the Filling:
- 1 cup creamy frosting (store-bought or homemade) – buttercream or cream cheese frosting adds a delightful richness. If making from scratch, ensure it is fluffy and spreadable for easy mixing.
- For the Coating:
- 12 oz melting chocolate (white, milk, or dark chocolate) – high-quality chocolate will enhance the overall flavor. Consider using compound chocolate for easier melting and handling.
- 1 tablespoon vegetable oil (for thinning chocolate) – ensures the chocolate coats smoothly. This helps achieve a perfect glossy finish.
- For Toppings:
- Sprinkles, crushed cookies, or chopped nuts (optional) – use colorful sprinkles for a fun look or crushed cookies for a crunchy texture. Try to match toppings with your cake flavor for a cohesive look!
Steps / Instructions
- Prepare the Cake: Preheat your oven to 350°F (175°C). In a large mixing bowl, combine the cake mix, eggs, water, and vegetable oil. Mix until well combined and smooth, ensuring there are no lumps for a uniform texture. A hand mixer can be helpful to achieve an airy batter.
- Bake the Cake: Pour the batter into a greased cake pan and bake according to the package instructions, typically 25-30 minutes. The cake is done when a toothpick inserted into the center comes out clean, indicating that it is fully cooked. The top should also spring back when gently pressed.
- Cool the Cake: Allow the cake to cool completely in the pan for about 10 minutes before transferring it to a wire rack to cool completely for an additional 30-45 minutes. This cooling process prevents the cakesicles from melting while being assembled. Patience here is key for optimal cakesicle integrity!
- Crumble the Cake: Once cooled, crumble the cake into a large bowl using your hands or a fork until you achieve a fine, even texture, resembling sand. This will help the cakesicles hold together better. Make sure to break up any large chunks to ensure a consistent mixture.
- Mix in the Frosting: Add the creamy frosting to the crumbled cake mixture. Use your hands to mix until fully combined, and the mixture holds together when pressed, creating a dough-like consistency. This is crucial for shaping the cakesicles. If the mixture feels too dry, add a bit more frosting until the desired consistency is achieved.
- Shape the Cakesicles: Using a cakesicle mold or popsicle molds, fill each cavity with the cake mixture, pressing down firmly to eliminate any air pockets. Insert popsicle sticks into the center of each mold, ensuring they are sturdy and well-placed. Fill the molds to the top for a generous cakesicle.
- Freeze: Place the filled molds in the freezer for at least 2 hours, or until completely set. This step ensures that the cakesicles firm up properly, making them easier to handle. For best results, freeze overnight if time allows.
- Melt the Chocolate: In a microwave-safe bowl, melt the chocolate with the vegetable oil in 30-second increments, stirring in between until smooth and fully melted. Be careful not to overheat the chocolate, as this can cause it to seize. Ensure it’s smooth and glossy for a beautiful finish on your cakesicles.
- Unmold the Cakesicles: Once frozen, carefully remove the cakesicles from the molds. They should come out easily if they were pressed firmly; if not, you can gently twist the mold to loosen them. If they resist, run warm water over the back of the mold briefly to loosen.
- Dip in Chocolate: Dip each cakesicle into the melted chocolate, ensuring it’s completely coated. Use a fork to lift it out, letting any excess chocolate drip off for a clean finish. For a more pronounced chocolate layer, dip the cakesicles twice.
- Add Toppings: While the chocolate is still wet, sprinkle your choice of toppings over the cakesicles for a festive touch. This is your chance to get creative with presentation! Adding toppings immediately helps them to adhere better to the chocolate.
- Set the Coating: Place the dipped cakesicles on a parchment-lined baking sheet and return them to the freezer for about 15-20 minutes to allow the chocolate to harden completely, ensuring a perfect snap when bitten into. Use this time to clean up your workspace for a seamless end to your baking session.
Tips & Tricks
- To ensure a smooth dipping process, make sure your chocolate is at the right consistency. If it’s too thick, add a little more vegetable oil, as this will help it coat the cakesicles more easily. A good test is to dip a spoon in the chocolate; it should drizzle off smoothly.
- You can customize the flavor of your cakesicles by choosing different cake mixes and frosting combinations. Consider using red velvet cake with cream cheese frosting for a festive touch or lemon cake mix with lemon frosting for a refreshing twist. The possibilities are endless with cakesicles!
- If you’re making a large batch, you can store the finished cakesicles in an airtight container in the freezer for up to two months. Just make sure to separate layers with parchment paper to prevent sticking. Label them with the flavor for quick access!
- For an easy cakesicle idea, consider using leftover cake from celebrations or holidays to create your frozen treats. This is a great way to avoid waste while making something delicious. Reinventing cake scraps into cakesicles can add to your creative repertoire!
- To create gluten-free cakesicles, simply use a gluten-free cake mix and ensure that all additional ingredients are gluten-free, including the frosting and chocolate. Many brands now offer excellent alternatives that rival traditional mixes.
- When decorating, try to use a variety of colorful toppings to make your cakesicles visually appealing, especially for birthday parties or seasonal events. Consider using themed sprinkles or edible glitter for added flair, enhancing both taste and presentation.
Variations
Get creative with the flavors and fillings for your cakesicles. Consider trying: You can learn more about this topic.
- Fruit-Flavored Cakesicles: Incorporate fresh fruit puree into the frosting or use fruit-flavored cake mix for a vibrant, fruity treat. Strawberry, blueberry, or mango are delicious options. Enhance the fruitiness with a layer of fruit jam inside.
- Seasonal Flavor Combinations: Use pumpkin spice cake mix with cream cheese frosting for fall-themed cakesicles that capture the essence of autumn. Other seasonal flavors, like peppermint or gingerbread, can be delightful during winter holidays.
- Vanilla Cakesicle Variations: For a classic taste, use vanilla cake mix and vanilla frosting, and coat with white chocolate for a beautiful contrast. Add vanilla bean specks for an upscale touch!
- No-Bake Cakesicles: For a no-bake version, use crushed cookies mixed with frosting and follow the same steps for assembly and freezing, making it a quick and easy dessert option. This method is particularly great for hot days when baking is less appealing.
Cakesicles
Cakesicles are the ultimate fun and creative dessert on a stick that combines the delightful flavors of cake pops with the refreshing appeal of popsicles.
Ingredients
- 1 box of cake mix (any flavor)
- 3 large eggs
- 1 cup water
- 1/3 cup vegetable oil
- 1 cup creamy frosting (store-bought or homemade)
- 12 oz melting chocolate (white, milk, or dark chocolate)
- 1 tablespoon vegetable oil (for thinning chocolate)
- Sprinkles, crushed cookies, or chopped nuts (optional)
Directions
Preheat your oven to 350°F (175°C). In a large mixing bowl, combine the cake mix, eggs, water, and vegetable oil. Mix until well combined and smooth.
Pour the batter into a greased cake pan and bake according to the package instructions, typically 25-30 minutes.
Allow the cake to cool completely in the pan for about 10 minutes before transferring it to a wire rack to cool for an additional 30-45 minutes.
Once cooled, crumble the cake into a large bowl using your hands or a fork until you achieve a fine, even texture.
Add the creamy frosting to the crumbled cake mixture. Use your hands to mix until fully combined.
Using a cakesicle mold or popsicle molds, fill each cavity with the cake mixture, pressing down firmly. Insert popsicle sticks into the center.
Place the filled molds in the freezer for at least 2 hours, or until completely set.
In a microwave-safe bowl, melt the chocolate with the vegetable oil in 30-second increments, stirring in between until smooth.
Once frozen, carefully remove the cakesicles from the molds.
Dip each cakesicle into the melted chocolate, ensuring it’s completely coated.
While the chocolate is still wet, sprinkle your choice of toppings over the cakesicles.
Place the dipped cakesicles on a parchment-lined baking sheet and return them to the freezer for about 15-20 minutes.
Recipe Reviews
- ★★★★★
Excellent recipe!
Leave a Reply
Your email address will not be published. Required fields are marked *