Irresistible Butterfinger Balls: No-Bake Bliss Awaits
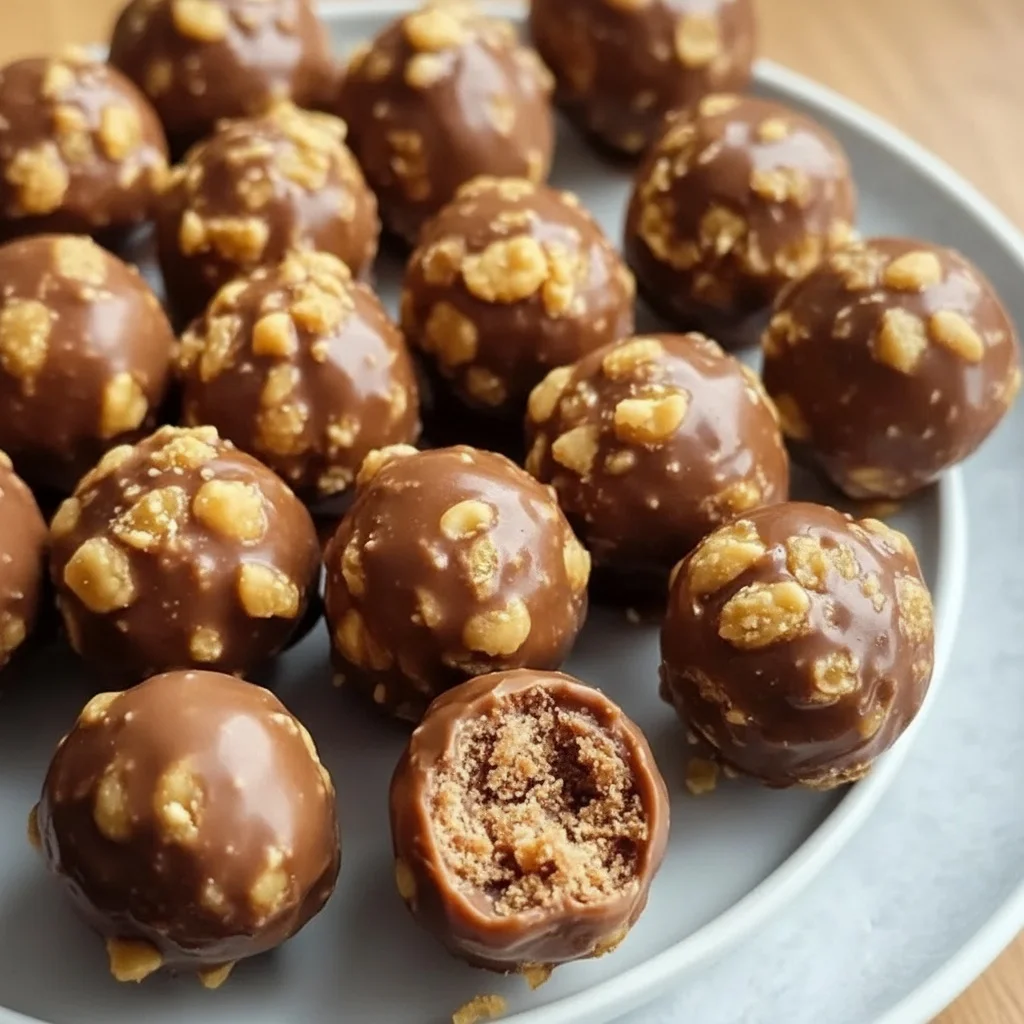
Indulging in a sweet treat doesn’t always have to involve lengthy baking sessions. Enter Butterfinger Balls—an irresistible no-bake dessert that combines the rich, creamy flavors of peanut butter and chocolate. These delightful bites are not only easy to make but also perfect for parties, family gatherings, or a simple after-dinner treat. With a few basic ingredients, you can whip up these creamy dessert bites and satisfy your sweet tooth in no time! The best part is that they require minimal cooking skills, making them accessible to bakers of all levels. Plus, they’re a crowd favorite, ensuring everyone will be asking for seconds!
Ingredients
- For the Butterfinger Balls:
- 1 cup creamy peanut butter
- 1 cup powdered sugar
- 1 ½ cups crushed Butterfinger bars (about 4 regular-sized bars; make sure to crush them finely for even distribution throughout the mixture)
- 1 teaspoon vanilla extract
- For the Chocolate Coating:
- 2 cups semi-sweet chocolate chips (note that high-quality chocolate chips will yield a smoother coating and richer flavor)
- 1 tablespoon coconut oil (optional, for smoother coating; this helps the chocolate flow better when melting)
- For Toppings (optional):
- Crushed Butterfinger bars to enhance texture and visual appeal, adding that extra crunch
- Sea salt for a sweet and salty contrast that elevates flavor, balancing the sweetness of the chocolate
Note: For the best flavor, use high-quality chocolate chips, as the chocolate coating is key to the overall taste. Make sure your peanut butter is creamy for easy mixing and a smooth texture; avoid crunchy varieties unless you prefer added texture. You can substitute the Butterfinger candy with any similar chocolate-covered candy bars if desired, such as Reese’s or Snickers, to create your own unique twist on these delectable treats. Additionally, feel free to experiment with flavored peanut butters for a different taste experience.
Steps / Instructions
- In a medium mixing bowl, combine the creamy peanut butter and powdered sugar. Stir until fully incorporated and smooth, ensuring there are no lumps for a creamy filling. The mixture should be thick but malleable, making it easy to form into balls.
- Add the crushed Butterfinger bars and vanilla extract to the mixture, folding gently until the ingredients are evenly distributed, creating a deliciously chunky texture. You should see bits of the Butterfinger throughout the mixture, which adds a delightful crunch.
- Using your hands, form the mixture into small balls, about 1 inch in diameter. This size is perfect for a single bite! Place the formed balls on a baking sheet lined with parchment paper to prevent sticking. If the mixture is too sticky, you can lightly coat your hands with powdered sugar to ease the rolling process.
- Once all the balls are formed, place them in the freezer for at least 30 minutes to firm up. This step is crucial for achieving a good shape; the firmer the balls, the easier they will be to coat. You’ll know they’re ready when they hold their shape well when pressed.
- While the Butterfinger balls are chilling, prepare the chocolate coating. In a microwave-safe bowl, combine the semi-sweet chocolate chips and coconut oil (if using) to enhance the smoothness of the melted chocolate. This combination will create a glossy finish to your treats.
- Microwave the chocolate in 30-second intervals, stirring in between, until melted and smooth. Be cautious not to overheat the chocolate; it should be glossy and fluid, reminiscent of melted chocolate syrup, which makes for a perfect coating consistency.
- Remove the chilled Butterfinger balls from the freezer. Dip each ball into the melted chocolate, ensuring it is completely coated. Use a fork for easier handling and to allow excess chocolate to drip off, ensuring an even layer of coating.
- Return the coated balls to the parchment-lined baking sheet. If desired, sprinkle crushed Butterfinger bars or a pinch of sea salt on top of the chocolate before it hardens, enhancing the visual appeal and flavor profile. This step is especially important for presentation, making your Butterfinger Balls irresistible!
- Allow the chocolate to set at room temperature, or place the tray back in the freezer for about 10 minutes until the chocolate coating is firm, ensuring a perfect bite. You can check if they’re set by gently tapping the chocolate; it should feel solid.
Tips & Tricks
- Storage: Store your Butterfinger Balls in an airtight container in the refrigerator for up to one week. They can also be frozen for up to 3 months—just layer them between parchment paper to prevent sticking. This makes them perfect for meal prep or making ahead of time for gatherings. Always allow them to come to room temperature for optimal flavor before serving.
- Make-Ahead: These no-bake treats can be made a day or two in advance. Simply store them in the refrigerator until ready to serve, allowing the flavors to meld for an even tastier treat. The longer they sit, the more the flavors come together, enhancing the overall taste experience.
- Avoid Common Mistakes: Ensure your peanut butter is fully blended with the powdered sugar to prevent the mixture from being too crumbly. Additionally, don’t skip the chilling step; it helps the balls hold their shape during coating, preventing any melting or deformation during the dipping process. Taking your time during each step will yield the best results.
- Alternate Chocolate Coating: For a different flavor, try using white chocolate or dark chocolate for the coating. You can even experiment with flavored chips like peanut butter or butterscotch! This can add an exciting twist to your Butterfinger Balls, making them even more personalized to your taste preferences.
Variations
While this recipe for Butterfinger Balls is delicious as is, there are plenty of ways to customize it: Check out our related guide for more tips. The foundational recipe provides a great platform for creativity. Don’t hesitate to think outside the box when it comes to flavors and ingredients!
- Dietary Alternatives: To make these treats vegan, use dairy-free chocolate chips and natural peanut butter without added sugars. For a gluten-free option, ensure your candy bars and chocolate are certified gluten-free. This way, everyone can enjoy these delicious bites, no matter their dietary restrictions.
- Flavor Variations: Swap out Butterfinger bars for Reese’s Pieces or chopped Snickers bars for a different flavor profile. You can also add a sprinkle of cinnamon, a dash of cayenne for a spicy kick, or even mix in some chopped nuts for added crunch! Each of these options can create a unique taste experience that you and your guests will love.
Serving Suggestions
Serve these delectable Butterfinger Balls at your next gathering, whether it’s a birthday party, holiday celebration, or just a cozy family night in. They make a great addition to a dessert platter alongside other easy chocolate desserts or rich chocolate desserts. Pair them with a glass of cold milk, a hot cup of coffee, or your favorite dessert wine for a truly indulgent treat! You can also present them in decorative cups or on a beautiful platter for an appealing display that will impress your guests, making them not only delicious but also a feast for the eyes.
Butterfinger Balls
An irresistible no-bake dessert that combines the rich, creamy flavors of peanut butter and chocolate.
Ingredients
- 1 cup creamy peanut butter
- 1 cup powdered sugar
- 1 ½ cups crushed Butterfinger bars (about 4 regular-sized bars)
- 1 teaspoon vanilla extract
- 2 cups semi-sweet chocolate chips
- 1 tablespoon coconut oil (optional)
- Crushed Butterfinger bars (for toppings)
- Sea salt (for toppings)
Directions
In a medium mixing bowl, combine the creamy peanut butter and powdered sugar. Stir until fully incorporated and smooth.
Add the crushed Butterfinger bars and vanilla extract to the mixture, folding gently until evenly distributed.
Using your hands, form the mixture into small balls, about 1 inch in diameter. Place on a baking sheet lined with parchment paper.
Chill the formed balls in the freezer for at least 30 minutes.
Prepare the chocolate coating by combining the semi-sweet chocolate chips and coconut oil in a microwave-safe bowl.
Microwave the chocolate in 30-second intervals, stirring in between, until melted and smooth.
Remove the chilled Butterfinger balls from the freezer. Dip each ball into the melted chocolate, ensuring it is completely coated.
Place the coated balls back on the parchment-lined baking sheet. Sprinkle with crushed Butterfinger bars or sea salt if desired.
Allow the chocolate to set at room temperature or in the freezer for about 10 minutes.
Nutrition Facts
Recipe Reviews
- ★★★★★
Excellent recipe!
Leave a Reply
Your email address will not be published. Required fields are marked *