Strawberry Milk Ice Pops
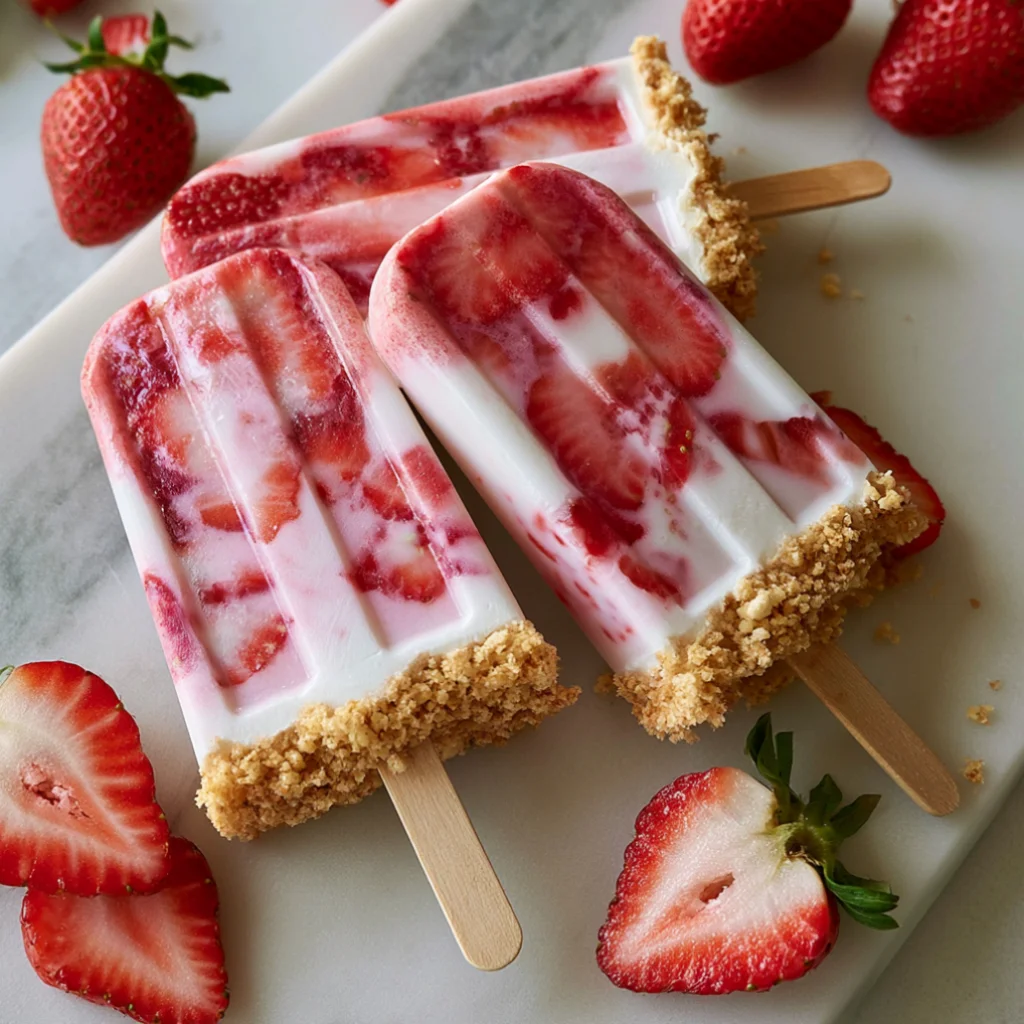
Indulging in the delightful taste of homemade strawberry milk ice pops is a treat that brings joy to both children and adults alike. These refreshing summer desserts are not only easy to make, but they also provide a fun way to enjoy fresh strawberries. With just a few simple ingredients, you can create creamy strawberry popsicles that are perfect for hot days, parties, or as a healthy snack. The vibrant color and sweet, fruity flavor make them a visual feast and a satisfying treat. Ready to dive into this delicious recipe? Let’s get started!
Ingredients
- Base Ingredients:
- 2 cups fresh strawberries, hulled and sliced. Choose ripe, sweet strawberries for the best flavor; frozen strawberries can be used in a pinch but will yield a different texture. Look for strawberries that are bright red and fragrant, as this ensures maximum sweetness.
- 1 cup milk (dairy or non-dairy, like almond or coconut milk). For a creamy texture, opt for full-fat options, especially if using coconut milk. Each type of milk will add its unique flavor; for instance, almond milk adds a subtle nuttiness.
- 1/2 cup Greek yogurt (optional for creaminess). This adds a rich texture and tangy flavor that complements the sweetness of the strawberries. You can also use regular yogurt, but Greek yogurt enhances the creaminess.
- 1/4 cup honey or maple syrup (adjust for sweetness). Experiment with agave syrup or coconut sugar as alternatives for a different sweetness profile. Adjust according to your taste preferences, and remember that the sweetness can intensify when frozen.
- Optional Add-ins:
- 1 teaspoon vanilla extract. This enhances the overall flavor and adds a lovely aromatic note, making the pops even more delicious.
- 1 tablespoon lemon juice (to enhance flavor). Fresh lemon juice brightens the taste and balances the sweetness of the strawberries, creating a more dynamic flavor profile.
Note: For dairy-free strawberry pops, simply omit the Greek yogurt and use non-dairy milk and yogurt alternatives. You can learn more about this topic and discover various health benefits associated with fresh strawberries, including their antioxidant properties and vitamins that promote overall well-being. Fresh strawberries are not only delicious but also low in calories, making them a smart choice for a guilt-free treat.
Steps / Instructions
- Prepare the Strawberries: Start by washing the fresh strawberries under cool water to remove any dirt or pesticides. Hull them by removing the green tops, and slice them into halves or quarters for easier blending. This step ensures an even mix and helps release their natural juices, which is crucial for flavor.
- Blend the Ingredients: In a blender, combine the sliced strawberries, milk, Greek yogurt (if using), honey or maple syrup, and vanilla extract. Blend until the mixture is smooth and creamy. If you prefer a chunkier texture, pulse the strawberries a few times after blending to maintain some fruit pieces, which can add to the visual appeal of your strawberry milk ice pops.
- Taste and Adjust: Taste the mixture and adjust the sweetness by adding more honey or maple syrup if desired. If you want a more vibrant flavor, add a splash of lemon juice and blend again. This step is crucial for achieving your perfect flavor balance, as personal preferences can vary widely.
- Transfer to Molds: Carefully pour the strawberry mixture into ice pop molds, filling them about 3/4 full to allow for expansion while freezing. This prevents overflow and messy cleanup later, ensuring your strawberry milk ice pops look as good as they taste.
- Add Sticks: If your molds come with sticks, insert them according to the manufacturer’s instructions. If not, you can freeze the pops for about an hour until slightly firm, then insert wooden sticks. This helps stabilize the popsicles as they freeze, ensuring they hold their shape.
- Freeze: Place the molds in the freezer and let them freeze for at least 4-6 hours, or until completely solid. For best results, leave them overnight. The longer they freeze, the easier they will be to unmold, resulting in a more enjoyable eating experience.
- Unmold and Serve: To remove the ice pops, run warm water over the outside of the molds for a few seconds. Gently pull on the sticks to release the pops. Serve immediately and enjoy the refreshing taste of your homemade strawberry milk ice pops! The satisfaction of enjoying treats made from scratch is unmatched.
Tips & Tricks
- Storage: Store any leftover strawberry milk ice pops in a sealed container or freezer bag in the freezer for up to 2 months. To prevent freezer burn, wrap each pop individually in plastic wrap. This keeps them fresh and enjoyable for longer, preserving their fantastic flavor and texture.
- Make-Ahead: These homemade strawberry ice pops can be made in batches ahead of time. They are a perfect treat to prepare before a summer party or family gathering, ensuring you have a popular dessert on hand for guests to enjoy, making your hosting duties easier.
- Common Mistakes to Avoid: Ensure that the strawberries are ripe for the best flavor. Additionally, blending the ingredients too much can lead to a thinner consistency, so blend just enough to combine without overdoing it. Keeping an eye on texture is crucial to achieve the desired popsicle consistency.
- Pro Technique: For a layered effect, pour half the strawberry mixture into the molds, freeze for about 30 minutes, then add another layer with blended strawberries mixed with yogurt for a creamy contrast. This not only looks stunning but adds an extra flavor dimension and can impress your guests.
Variations
- Dairy-Free Version: Substitute cow’s milk and Greek yogurt with almond milk and dairy-free yogurt alternatives for a refreshing dairy-free strawberry pop. This maintains the delicious taste while catering to dairy sensitivities, allowing everyone to enjoy the treat.
- Flavor Combinations: Experiment by adding other fruits like bananas or blueberries to the mixture for creative strawberry flavor combinations. This can introduce new flavors and make your pops even more exciting, giving you endless varieties to try.
- Sweetness Levels: Adjust the amount of sweetener based on personal preference or use natural sweeteners like agave syrup for a healthier option. Adjusting sweetness can greatly enhance your enjoyment of the final product, making the popsicles just right for you.
Serving Suggestions
These strawberry milk ice pops are best served as a fun summer treat. Pair them with fresh fruit salads or serve alongside a refreshing glass of lemonade or iced tea. You can also garnish them with mint leaves for an added touch of freshness. The colorful presentation and refreshing taste make these ice pops a hit at any gathering, adding a festive vibe. Check out our related guide for more tips on how to serve these delightful desserts and impress your family and friends.
Strawberry Milk Ice Pops
Indulging in the delightful taste of homemade strawberry milk ice pops is a treat that brings joy to both children and adults alike. These refreshing summer desserts are not only easy to make, but they also provide a fun way to enjoy fresh strawberries.
Ingredients
- 2 cups fresh strawberries, hulled and sliced
- 1 cup milk (dairy or non-dairy, like almond or coconut milk)
- 1/2 cup Greek yogurt (optional for creaminess)
- 1/4 cup honey or maple syrup (adjust for sweetness)
- 1 teaspoon vanilla extract (optional)
- 1 tablespoon lemon juice (optional)
Directions
Wash the fresh strawberries under cool water to remove any dirt or pesticides. Hull them and slice into halves or quarters.
In a blender, combine the sliced strawberries, milk, Greek yogurt (if using), honey or maple syrup, and vanilla extract. Blend until smooth.
Taste the mixture and adjust the sweetness with more honey or maple syrup, if desired. Add lemon juice for a more vibrant flavor, if you like.
Pour the strawberry mixture into ice pop molds, filling them about 3/4 full.
Insert sticks into the molds according to the manufacturer's instructions, or freeze for about an hour and then insert wooden sticks.
Place the molds in the freezer for at least 4-6 hours, or until completely solid.
To unmold, run warm water over the outside of the molds for a few seconds, then gently pull on the sticks to release the pops.
Recipe Reviews
- ★★★★★
Excellent recipe!
Leave a Reply
Your email address will not be published. Required fields are marked *