Old-Fashioned Peanut Butter Fudge
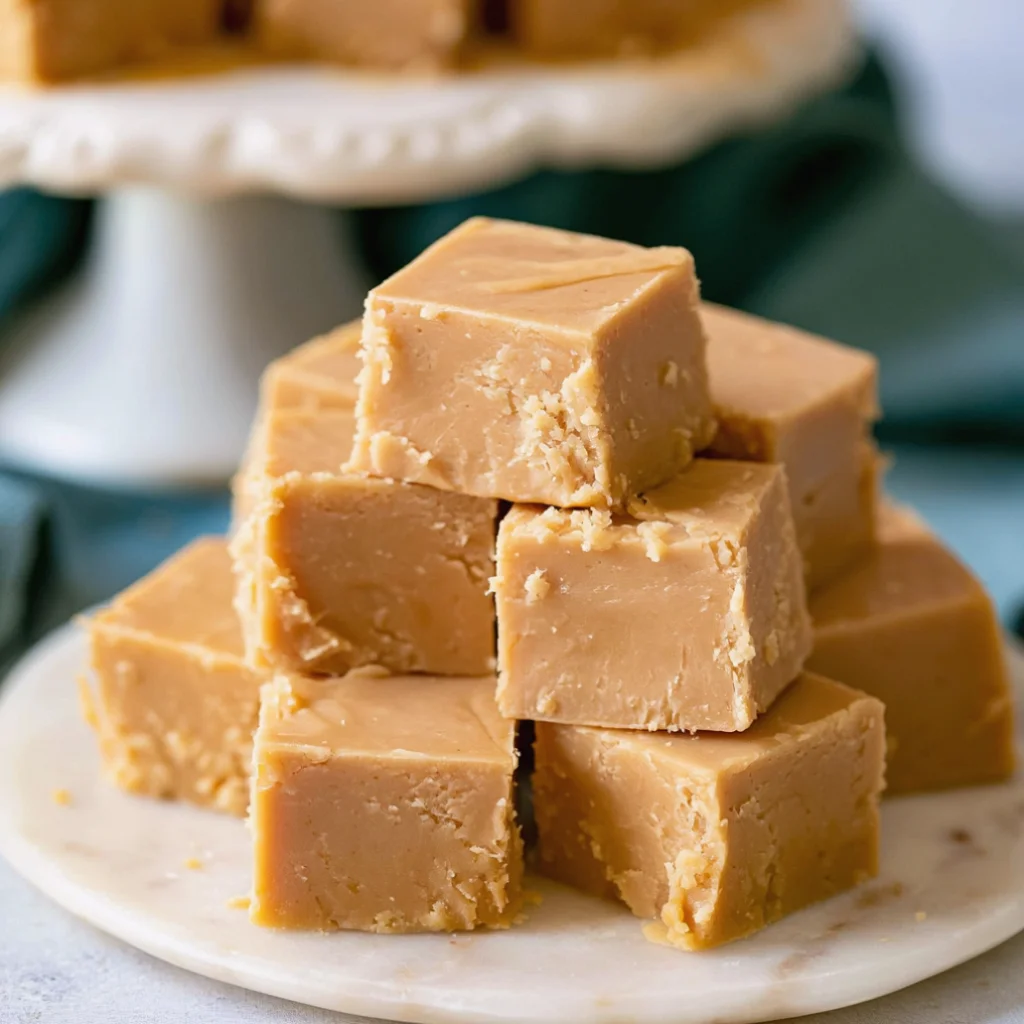
If you’re looking for a delightful treat that evokes nostalgia and satisfies your sweet tooth, look no further than Old-Fashioned Peanut Butter Fudge. This creamy and rich dessert is a beloved classic, perfect for holiday gatherings or as a sweet treat for parties. With just a few simple ingredients and no baking required, this easy fudge recipe allows you to indulge in a homemade delicacy that captures the essence of traditional candy recipes. The combination of smooth peanut butter and buttery sweetness creates a melt-in-your-mouth experience that is hard to resist. As you prepare this treat, you may find yourself reminiscing about family gatherings where this fudge was a staple, adding a layer of warmth to your indulgence.
Ingredients
- Wet Ingredients:
- 1 cup creamy peanut butter
- ½ cup unsalted butter
- 1 teaspoon vanilla extract
- Dry Ingredients:
- 4 cups powdered sugar
- 1 cup milk chocolate chips (optional for topping)
For the best results, use high-quality creamy peanut butter for a smooth and rich flavor. Opt for brands that do not contain added sugars or oils to maintain the integrity of the fudge. If you prefer a healthier option, you can substitute with natural peanut butter, although the texture may vary slightly. It’s important to ensure that the butter is at room temperature for easier mixing; this will help it blend seamlessly with the other ingredients. Consider using organic butter for a creamier texture and enhanced flavor. You can learn more about this topic and discover the rich history of this classic treat.
Steps / Instructions
- Prepare a 9×9-inch baking dish by lining it with parchment paper. Leave some overhang on the sides for easy removal later. This will ensure your fudge doesn’t stick and helps in achieving perfectly cut squares. The lined dish will also allow you to lift the fudge out effortlessly once it has set.
- In a medium saucepan over low heat, melt the unsalted butter. Stir continuously until it is fully melted, ensuring it does not brown, which can alter the flavor of your fudge. The low heat is crucial to prevent scorching, as burnt butter can impart a bitter taste.
- Once the butter is melted, remove the saucepan from the heat and mix in the creamy peanut butter until fully combined. This should create a smooth, velvety mixture that is both comforting and inviting. Take your time to stir until no lumps remain, achieving a perfect blend of flavors.
- Add the vanilla extract to the peanut butter mixture and stir well to incorporate, enhancing the overall flavor profile of the fudge. Vanilla not only adds depth but also complements the nutty flavor of the peanut butter beautifully.
- Gradually sift in the powdered sugar, one cup at a time, mixing thoroughly after each addition. Continue until all the sugar is incorporated and the mixture is thick and creamy, resembling a dough-like consistency. This gradual addition helps prevent clumping and ensures a smooth finish.
- Transfer the fudge mixture into the prepared baking dish. Use a spatula to spread it evenly into the corners, smoothing the top with the back of the spatula for a uniform look. This step is crucial for an aesthetically pleasing cut, ensuring each piece looks as good as it tastes.
- If desired, sprinkle the milk chocolate chips evenly over the top. Gently press them into the fudge to ensure they adhere well and create a decadent chocolate-peanut butter combination that enhances every bite. This extra layer adds both texture and an appealing visual contrast to the creamy fudge.
- Allow the fudge to cool at room temperature for about 30 minutes, then refrigerate for at least 2 hours or until firm. The cooling process is vital for the fudge to set properly, creating that perfect texture. If you want to expedite the process, you can place it in the freezer for about 15-20 minutes.
- Once set, lift the fudge out of the baking dish using the parchment paper overhang. Cut into squares and serve! Enjoy the delightful aroma and creamy texture as you savor this classic indulgence. Each bite should provide a satisfying crunch from the chocolate chips, complementing the smoothness of the fudge.
Tips & Tricks
For the best fudge consistency, make sure to sift the powdered sugar before adding it to the mixture. This will help you achieve a smooth texture that is free of lumps. If you find your fudge is too crumbly, add a little extra melted butter or peanut butter to moisten it. Remember, achieving the right balance of ingredients is key to that classic fudge texture. To store, keep the fudge in an airtight container in the refrigerator, where it will last for up to two weeks. This fudge can also be made ahead of time, making it a great option for holiday candy gifts or last-minute party desserts. Check out our related guide for more tips to perfect your fudge-making skills.
Common mistakes to avoid include not properly measuring the powdered sugar, which can affect the fudge’s texture. You want the consistency to be just right — too much sugar can make it overly stiff, while too little can make it too soft. Additionally, be careful not to overheat the peanut butter mixture, as this can cause it to become too oily and alter the fudge’s rich flavor. If you’re looking for a silky finish, let the fudge sit at room temperature for a few minutes after refrigerating to soften it slightly before cutting, which also makes for easier slicing. A sharp knife can also make a significant difference in getting clean edges on your fudge pieces.
Variations
This Old-Fashioned Peanut Butter Fudge is wonderfully versatile. For a twist, consider adding a pinch of sea salt on top for a salted caramel effect that will balance the sweetness beautifully. If you’re looking for a vegan option, substitute the butter with coconut oil and use a plant-based creamy peanut butter to maintain that creamy texture without the use of dairy. To create a different flavor profile, mix in ingredients like crushed nuts for added crunch, toffee bits for a caramelized flavor, or even a swirl of raspberry jam before setting in the fridge. Each variation provides a unique take on this classic dessert while still keeping that rich and decadent fudge base intact.
Serving Suggestions
Serve your homemade fudge on a decorative plate for a stunning presentation that will catch the eye of your guests. Pair it with a glass of cold milk or a cup of coffee for a delightful treat any time of day, making it an ideal option for afternoon snacks or dessert after dinner. For a festive touch, consider garnishing with crushed peanuts or a drizzle of melted chocolate to elevate its appearance and flavor. This fudge also makes an excellent addition to dessert platters at gatherings, ensuring it’ll be a hit among chocolate lovers and peanut butter fans alike. You might also consider serving it alongside a scoop of vanilla ice cream for an indulgent experience! The combination of warm fudge and cold ice cream creates a delightful contrast that is sure to impress.
Old-Fashioned Peanut Butter Fudge
A delightful treat that evokes nostalgia and satisfies your sweet tooth. This creamy and rich dessert is a beloved classic, perfect for holiday gatherings or as a sweet treat for parties.
Ingredients
- 1 cup creamy peanut butter
- ½ cup unsalted butter
- 1 teaspoon vanilla extract
- 4 cups powdered sugar
- 1 cup milk chocolate chips (optional for topping)
Directions
Prepare a 9x9-inch baking dish by lining it with parchment paper.
In a medium saucepan over low heat, melt the unsalted butter.
Once the butter is melted, remove from heat and mix in the creamy peanut butter until fully combined.
Add the vanilla extract to the peanut butter mixture and stir well.
Gradually sift in the powdered sugar, one cup at a time, mixing thoroughly after each addition.
Transfer the fudge mixture into the prepared baking dish and spread it evenly.
If desired, sprinkle the milk chocolate chips over the top and press them into the fudge.
Allow the fudge to cool at room temperature for about 30 minutes, then refrigerate for at least 2 hours until firm.
Once set, lift the fudge out of the baking dish using the parchment paper and cut into squares.
Nutrition Facts
Recipe Reviews
- ★★★★★
Excellent recipe!
Leave a Reply
Your email address will not be published. Required fields are marked *