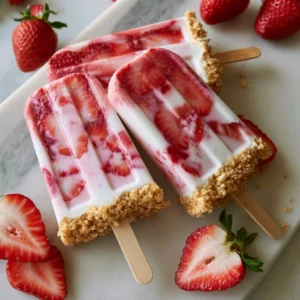
Hawaiian Tropical Cakesicles
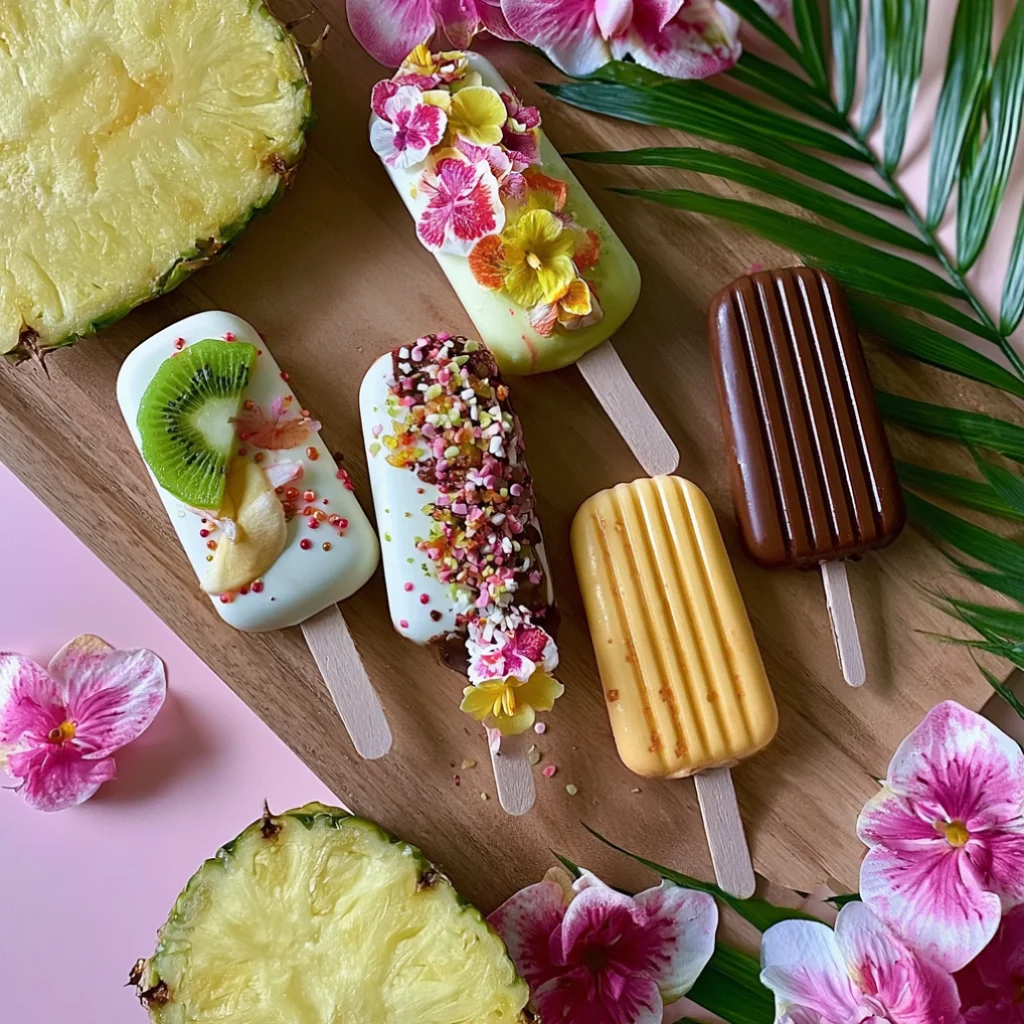
Introduce your taste buds to a slice of paradise with these delightful Hawaiian Tropical Cakesicles. Perfect for summer parties, luaus, or simply as a refreshing treat, these no-bake cakesicles are a luscious blend of tropical flavors, featuring coconut cream and pineapple. They’re an easy-to-make dessert that kids and adults alike will adore. Let’s get started on this fun and fruity adventure!
Ingredients
- For the Coconut Cream Base:
- 1 cup coconut cream (preferably full-fat for rich flavor; this will ensure a creamy and decadent texture)
- 1/2 cup granulated sugar (adjust sweetness to your preference, using less if desired)
- 1 teaspoon vanilla extract (for added depth of flavor)
- 1/4 teaspoon salt (to enhance the overall sweetness and flavor profile)
- For the Pineapple Layer:
- 1 cup crushed pineapple (drained well to prevent excess moisture; using fresh pineapple can enhance flavor)
- 1/2 cup coconut cream (adds creaminess to balance the tartness of pineapple)
- 2 tablespoons honey or agave syrup (optional, for extra sweetness; maple syrup can also be used as a vegan alternative)
- For the Chocolate Coating:
- 1 cup white chocolate chips (or dark chocolate for a twist; the choice of chocolate can significantly impact flavor)
- 1 tablespoon coconut oil (to help with melting and smoothness, ensuring a shiny finish)
- For Garnish:
- Shredded coconut (preferably unsweetened for a more natural flavor; this adds texture and enhances visual appeal)
- Diced tropical fruits (like mango or kiwi, for added color and taste; consider using colorful fruits to make the presentation pop)
Note: Ensure your coconut cream is chilled for easy mixing. This not only improves the texture but also enhances the flavor. You can substitute honey with maple syrup for a vegan option, ensuring everyone can enjoy these Hawaiian Tropical Cakesicles. You can learn more about this topic.
Steps / Instructions
- Prepare Your Molds: Get your homemade cakesicle molds ready by lightly greasing them with cooking spray to ensure easy removal later. This step is essential as it will save you time and frustration when it comes to unmolding the cakesicles. Additionally, using silicone molds can further ease the removal process and create a fun shape.
- Make the Coconut Cream Base: In a mixing bowl, combine the coconut cream, granulated sugar, vanilla extract, and salt. Whisk until smooth and creamy. This base will provide a rich, sweet backdrop for your cakesicles, creating a delightful contrast with the tartness of the pineapple. Make sure there are no lumps, as a smooth mixture leads to a better texture in the finished product.
- Add the Pineapple Layer: In another bowl, mix the crushed pineapple with 1/2 cup of coconut cream and honey (if using). Stir until combined. The pineapple will add a refreshing burst of flavor to the cakesicles, balancing the sweetness of the coconut cream perfectly. Additionally, using a fork to fluff up the crushed pineapple can add a bit more air into the mix, enhancing the overall texture.
- Layer the Mixture: Start layering your molds: fill the bottom of each mold with the coconut cream base, smoothing it with a spatula. Follow with a layer of the pineapple mixture. Repeat until the molds are filled, ensuring the last layer is the coconut cream. This layering technique not only enhances the visual appeal but also creates a delightful flavor experience with each bite. For added fun, consider using a toothpick to swirl the layers slightly for a marbled effect.
- Insert Sticks: Carefully insert popsicle sticks into each cakesicle, ensuring they are centered. This step is crucial for easy handling later, allowing for a seamless eating experience. If the mixture is too soft, place the molds in the freezer for about 15 minutes before inserting the sticks to help them hold their shape better.
- Freeze: Place the molds in the freezer for at least 4 hours, or until completely frozen solid. This is the longest step but well worth the wait! A good test is to gently tap the molds; if they feel firm, they’re ready for the next step. For best results, allow them to freeze overnight, especially if you’re making a larger batch.
- Prepare the Chocolate Coating: Melt the white chocolate chips and coconut oil together in a microwave-safe bowl. Heat in increments of 30 seconds, stirring in between until smooth. This will create a glossy finish that not only tastes amazing but also looks visually appealing. Be careful not to overheat the chocolate, as it can become grainy; stirring thoroughly will ensure a smooth consistency.
- Unmold the Cakesicles: Once frozen, carefully remove the cakesicles from the molds by gently pulling on the sticks. If they stick, run warm water over the outside of the mold for a few seconds to loosen them. Be gentle to avoid breaking the cakesicles. If using silicone molds, flexing them slightly can also help release the cakesicles more easily.
- Dip in Chocolate: Dip each cakesicle into the melted chocolate, allowing the excess to drip off. This creates a delicious outer layer that complements the tropical flavors inside. Ensure an even coating for a professional finish, and consider using a fork to assist in dipping and removing excess chocolate.
- Add Toppings: Immediately sprinkle shredded coconut and diced tropical fruits over the chocolate coating before it sets. This gives a beautiful, festive look and enhances the tropical theme, making them perfect for any summer gathering. You can also drizzle some additional chocolate over the top for an extra decorative touch.
- Chill Again: Place the coated cakesicles on a baking sheet lined with parchment paper and return them to the freezer for about 30 minutes or until the chocolate hardens completely. This final chill will ensure that your cakesicles are ready for serving and will hold their shape well. Once set, you can store them in an airtight container in the freezer for later enjoyment.
Tips & Tricks
- Storage: Keep your Hawaiian Tropical Cakesicles in an airtight container in the freezer for up to two weeks. They make a perfect grab-and-go treat during warm weather, allowing you to enjoy a taste of the tropics anytime. If you are storing multiple layers, consider placing parchment paper between layers to prevent sticking.
- Make-Ahead Options: You can prepare the coconut cream base and pineapple layer a day in advance, storing them separately in the fridge until ready to assemble. This will save you time on the day of your event or gathering, making the process smoother. Simply bring the mixtures to room temperature before assembly for easier layering.
- Avoid Common Mistakes: Make sure to drain the crushed pineapple well to avoid excess moisture, which could affect the texture of your cakesicles. A good tip is to use a fine mesh strainer to ensure it’s as dry as possible. Additionally, ensure your coconut cream is well-mixed to avoid any separation during the freezing process.
- Pro Techniques: For a more intense coconut flavor, toast the shredded coconut before using it as a topping, enhancing both flavor and texture. This adds a wonderful crunch and aroma that pairs perfectly with the other ingredients. Consider infusing your coconut cream with a touch of coconut extract for an even richer flavor profile.
Hawaiian Tropical Cakesicles
Introduce your taste buds to a slice of paradise with these delightful Hawaiian Tropical Cakesicles. Perfect for summer parties, luaus, or simply as a refreshing treat, these no-bake cakesicles are a luscious blend of tropical flavors, featuring coconut cream and pineapple.
Ingredients
- 1 cup coconut cream (preferably full-fat for rich flavor)
- 1/2 cup granulated sugar (adjust sweetness to your preference)
- 1 teaspoon vanilla extract
- 1/4 teaspoon salt
- 1 cup crushed pineapple (drained well)
- 1/2 cup coconut cream
- 2 tablespoons honey or agave syrup (optional)
- 1 cup white chocolate chips
- 1 tablespoon coconut oil
- Shredded coconut (unsweetened)
- Diced tropical fruits (like mango or kiwi)
Directions
Prepare Your Molds: Lightly grease your homemade cakesicle molds with cooking spray.
Make the Coconut Cream Base: In a mixing bowl, combine the coconut cream, granulated sugar, vanilla extract, and salt. Whisk until smooth and creamy.
Add the Pineapple Layer: In another bowl, mix the crushed pineapple with 1/2 cup of coconut cream and honey (if using). Stir until combined.
Layer the Mixture: Fill the bottom of each mold with the coconut cream base, smoothing it with a spatula. Follow with a layer of the pineapple mixture. Repeat until the molds are filled, ensuring the last layer is the coconut cream.
Insert Sticks: Carefully insert popsicle sticks into each cakesicle, ensuring they are centered.
Freeze: Place the molds in the freezer for at least 4 hours, or until completely frozen solid.
Prepare the Chocolate Coating: Melt the white chocolate chips and coconut oil together in a microwave-safe bowl until smooth.
Unmold the Cakesicles: Once frozen, carefully remove the cakesicles from the molds.
Dip in Chocolate: Dip each cakesicle into the melted chocolate, allowing the excess to drip off.
Add Toppings: Immediately sprinkle shredded coconut and diced tropical fruits over the chocolate coating before it sets.
Chill Again: Place the coated cakesicles on a baking sheet lined with parchment paper and return them to the freezer for about 30 minutes or until the chocolate hardens completely.
Recipe Reviews
- ★★★★★
Excellent recipe!
Leave a Reply
Your email address will not be published. Required fields are marked *